Find your way around
Open a project from Projects to enter its working branch. Flow is the canvas; Code edits its files; Documentation explains the project; Variables configures shared values; History lists executions; Jobs manages repeatable runs; Project settings contains access, connections, Python, partitions, extensions and general settings. Partition and extension settings apply to the branch shown in the top bar.
Projects shows the last modification date and latest run status. From seven projects, search by project name, or sort by name, modification date or latest run. Code opens the selected node’s source, or the README without a selected node. Its tree labels node files by display name, keeps file paths in tooltips, and collapses built-in templates by default. Filter files… matches paths and node display names, revealing matching files inside folders. Press Enter to open the first match or Escape to clear the filter; filtering keeps your editor draft. Markdown, JSON, Python, SQL and TOML files have distinct icons.
Build and inspect
Add a palette item by clicking it or dragging it onto the canvas. While dragging, the preview uses the node’s shape and the canvas zoom, and is crossed out where a drop does nothing; release to place the center of the shape at the pointer. Search node types… filters the palette, and Project templates lists the templates created in the project. Connect an output to an input, or choose the upstream output in the node’s inspector. Connected sockets are filled, unused outputs stay hollow, and an input without a source is orange on the node until you connect it. Point at a node or a link to highlight it. Click a link to select it, then press Delete or Backspace to disconnect it. Shift-click selects multiple links; Ctrl/Cmd+Z undoes a deletion. Select a node for its parameters on the right and its results below. Double-click a SQL or Python node to edit its code; a linked node opens its shared template. Edit code at the top of the inspector does the same. The icons under it run the node with its ancestors, mute it, duplicate it, link it to a template or remove it; point at an icon for its name, or right-click the node for the same actions in a menu. Removing a node can be undone with Undo in the notification or Ctrl/Cmd+Z. Double-click a component to open its contents; use the breadcrumbs to return. Fit view brings the graph into view. Auto-arrange nodes places dependencies in columns, orders each column to avoid crossing links, and lines up linked sockets. Drag a port onto empty space to add a compatible connected node.
Press Escape to clear the selection and close its inspector and results. Selecting a node opens both panels again. An open dialog, menu or list of suggestions takes Escape first, and the code editor keeps it for itself.
Select one or more nodes and press M, or choose Mute node (M) among a node’s actions, to bypass their code; repeat to restore it. A muted node is faded, with a dashed outline and its links drawn through it, and its inspector offers Unmute node (M). Code, parameters and links are kept, the state is saved with the project, and undo works as for other edits.
Each output receives the input in the same position; extra outputs reuse the first input, and other inputs are ignored. A muted component bypasses its whole subgraph, and a muted export writes nothing. Sources have no input to pass through, so they cannot be muted. Muting or unmuting makes downstream results stale until the next run, and downstream code must accept the passthrough columns. The code editor’s preview still computes the node’s own code.
To remove a step for good without redrawing its links, right-click it and choose
Remove and reconnect, or select it and press Ctrl/Cmd+Delete (or Backspace):
for A -> B -> C, removing B this way links A to C, where an ordinary removal
leaves them disconnected. The action appears only for a transformation of the main
flow with one input and one output, a connected source and at least one consumer.
Every consumer then reads the upstream output, and one Undo restores the node,
its code and its links. As with muting, downstream code must accept the upstream
columns.
Node names come from Display name, then the SQL -- @label directive or
template name. Diagnostics, lineage, variable usage, conflict titles and new
Git commits use the same names. References inside a component include its parent
path; IDs remain available in file paths and tooltips.
Find nodes and projects
Use Find a node… to search the current graph by label, ID or template. Choose a result with the mouse or the arrow keys and Enter to select and center it. Inside a component, this searches that component’s nodes.
Search instance in the top bar finds projects, open branches and placed nodes across projects you can read, including nested components. Results show their project, branch and component path; selecting one opens that location. Search uses saved project metadata, excluding SQL, parameter values and result rows. It also offers Run all, New working branch, project tabs and settings sections according to the current context and permissions. Actions appear before typing; filter by their names or settings category.
Press Ctrl+F (⌘F on macOS) for canvas search or Ctrl+K (⌘K) for instance search.
Save and run
The flow has no Save button. The inspector saves a parameter, the guided forms and the node documentation after a short pause in typing, or when you leave the field; the code editor does the same, saves at once with Ctrl+S (⌘S), and saves before it closes. The top bar shows Saving…, All changes saved or Unsaved changes; a failed save shows its error where you typed and is retried when you edit again or leave the field.
A save applies its project files and Git commit together: a failed save leaves the previous files and branch commit in place.
Every run first saves pending editor changes and waits for saves already in progress; a failed save stops the launch. Run all runs the whole flow; a node’s Run with ancestors runs a smaller scope. A run from the interface is refused while an input in its scope has no source: the banner names the input and the node is selected. Stop execution requests cancellation of active SQL. A protected environment asks for confirmation.
While a run is active, the strip below the project tabs, and a running Job’s details, show its environment, completed nodes (or partitions, failed ones counted separately) and an approximate time remaining. The estimate uses previous successful node durations in the same worktree and environment.
On the canvas, nodes waiting in the run show Pending, and running nodes show their elapsed time. A node with a previous successful duration fills from left to right with its expected progress, keeping the last part of the fill for the actual result. A component combines the nodes inside it and stays in progress from its first node to its last one; partitioned nodes are in progress while their partition keys execute. Without a previous duration, or once a node runs longer than before, a sweep shows activity instead of progress, and the status tooltip compares both durations. A failure shows as soon as it happens. Links into running nodes animate, and links between nodes this run finished stay highlighted. With reduced motion, the sweep and the pulse around running nodes are replaced by a steady tint.
Successful canvas nodes show the primary output’s row count; stale, failed and warning indicators remain visible. Results belong to a branch and environment; see result lifetime and environments.
Undo, copy and paste
On the canvas, Ctrl+Z (⌘Z) undoes your latest change of this session and Ctrl+Shift+Z or Ctrl+Y (⌘⇧Z) redoes it, including parameters, code, deleted nodes, groups, library imports, variable renames and conflict resolutions; deleting nodes also offers Undo in its message. An undo saves the inverse of that change as a new commit: later edits to other nodes, yours or a collaborator’s, are kept, and a conflicting one is reported like any concurrent edit. Ctrl+C and Ctrl+V (⌘C, ⌘V) copy the selected nodes and paste them, with the connections between them, into this flow, a component or another branch opened in the same browser tab; copies get new IDs and are offset. These shortcuts do nothing while you type in a field or editor, or while a dialog is open.
Preferences and access
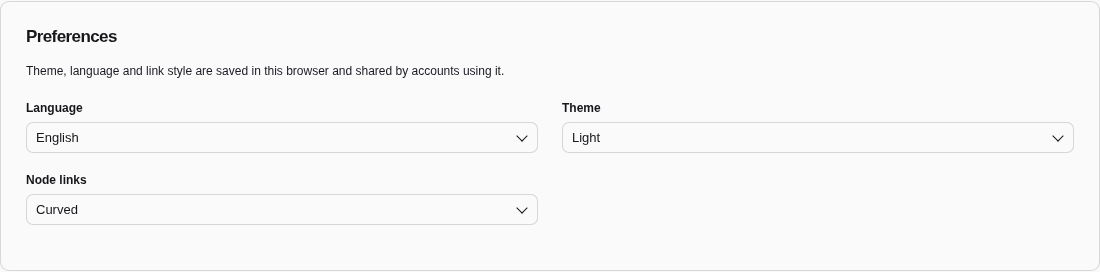
Use the account menu for User settings. Its sections separate Preferences (language, theme and link style), Password, SSH key for Git and API tokens. Each section has its own URL for bookmarks and supports browser back and forward. Duckpad supports English, French and Portuguese, with light and dark themes. Node links are curved by default; Right angles draws them with vertical segments, and links from different outputs never share one. Preferences do not change project files. Available actions depend on your instance and project roles.
The initial language follows your browser’s supported languages and the theme follows your system. A manual choice is saved in this browser and takes priority on later visits.
For your first working pipeline, follow Duckpad in 15 minutes. Then use your own data, or consult troubleshooting when an action or result is unexpected.